> ## Documentation Index
> Fetch the complete documentation index at: https://docs.livepeer.org/llms.txt
> Use this file to discover all available pages before exploring further.
# Set up and listen for webhooks
> Learn how to set up a webhook using Node.js and Ngrok to receive notifications from Livepeer.
A webhook trigger event refers to a specific occurrence or action in Livepeer
that prompts the webhook to send data to another system. You can learn more
about the different webhook events in the Studio
[Webhook Core Concept](/developers/core-concepts/studio/webhooks) section.
Setting up a webhook using Node.js and Ngrok allows you to receive real-time
data from Livepeer. In this guide, we'll walk you through the steps to set up a
webhook using Node.js and Ngrok to receive notifications from Livepeer.
### Create a New Node.js Project
Open your terminal and create a new directory for your project:
```sh theme={"theme":{"light":"github-light","dark":"dark-plus"}}
mkdir webhook-project
cd webhook-project
```
Next, initialize a new Node.js project:
```sh theme={"theme":{"light":"github-light","dark":"dark-plus"}}
npm init -y
```
### Install Dependencies
You'll need the Express.js framework to create a web server and the body-parser
middleware to parse incoming JSON data.
```sh theme={"theme":{"light":"github-light","dark":"dark-plus"}}
npm install express body-parser --save
```
### Create an Express.js Server
Create an `app.js` file in your project directory and set up an Express.js
server:
```js theme={"theme":{"light":"github-light","dark":"dark-plus"}}
const express = require("express");
const bodyParser = require("body-parser");
const app = express();
const port = 3000;
// Parse JSON requests
app.use(bodyParser.json());
// Define a route to handle incoming webhook data
app.post("/webhook", (req, res) => {
const payload = req.body;
console.log("Received webhook data:", payload);
// Handle the webhook data here
res.sendStatus(200);
});
// Start the server
app.listen(port, () => {
console.log(`Server is running on http://localhost:${port}`);
});
```
next, run your Express server using the following command:
```
node app.js
```
Your Express server is now running locally on [http://localhost:3000](http://localhost:3000).
In this case, we're using Ngrok to expose our local server to the internet. If
you're running your server on a remote server, you can skip the next step. And
for production applications, you'll want to deploy your server to a cloud
provider like Vercel or Fly.io.
### Set Up Ngrok
Ngrok will create a secure tunnel to expose your local server to the internet.
In a new terminal window, run the following command:
```sh theme={"theme":{"light":"github-light","dark":"dark-plus"}}
ngrok http 3000
```
If you don't have Ngrok installed, you can download it
[here](https://ngrok.com/download).
Ngrok will provide a public URL (e.g., [https://abc123.ngrok.io](https://abc123.ngrok.io)). You'll use this
URL as your webhook endpoint.
### Set Up a Webhook in Livepeer Studio
Log in to [Livepeer Studio](https://livepeer.studio/) and navigate to the
[Developers/Webhooks](https://livepeer.studio/dashboard/developers/webhooks)
page.
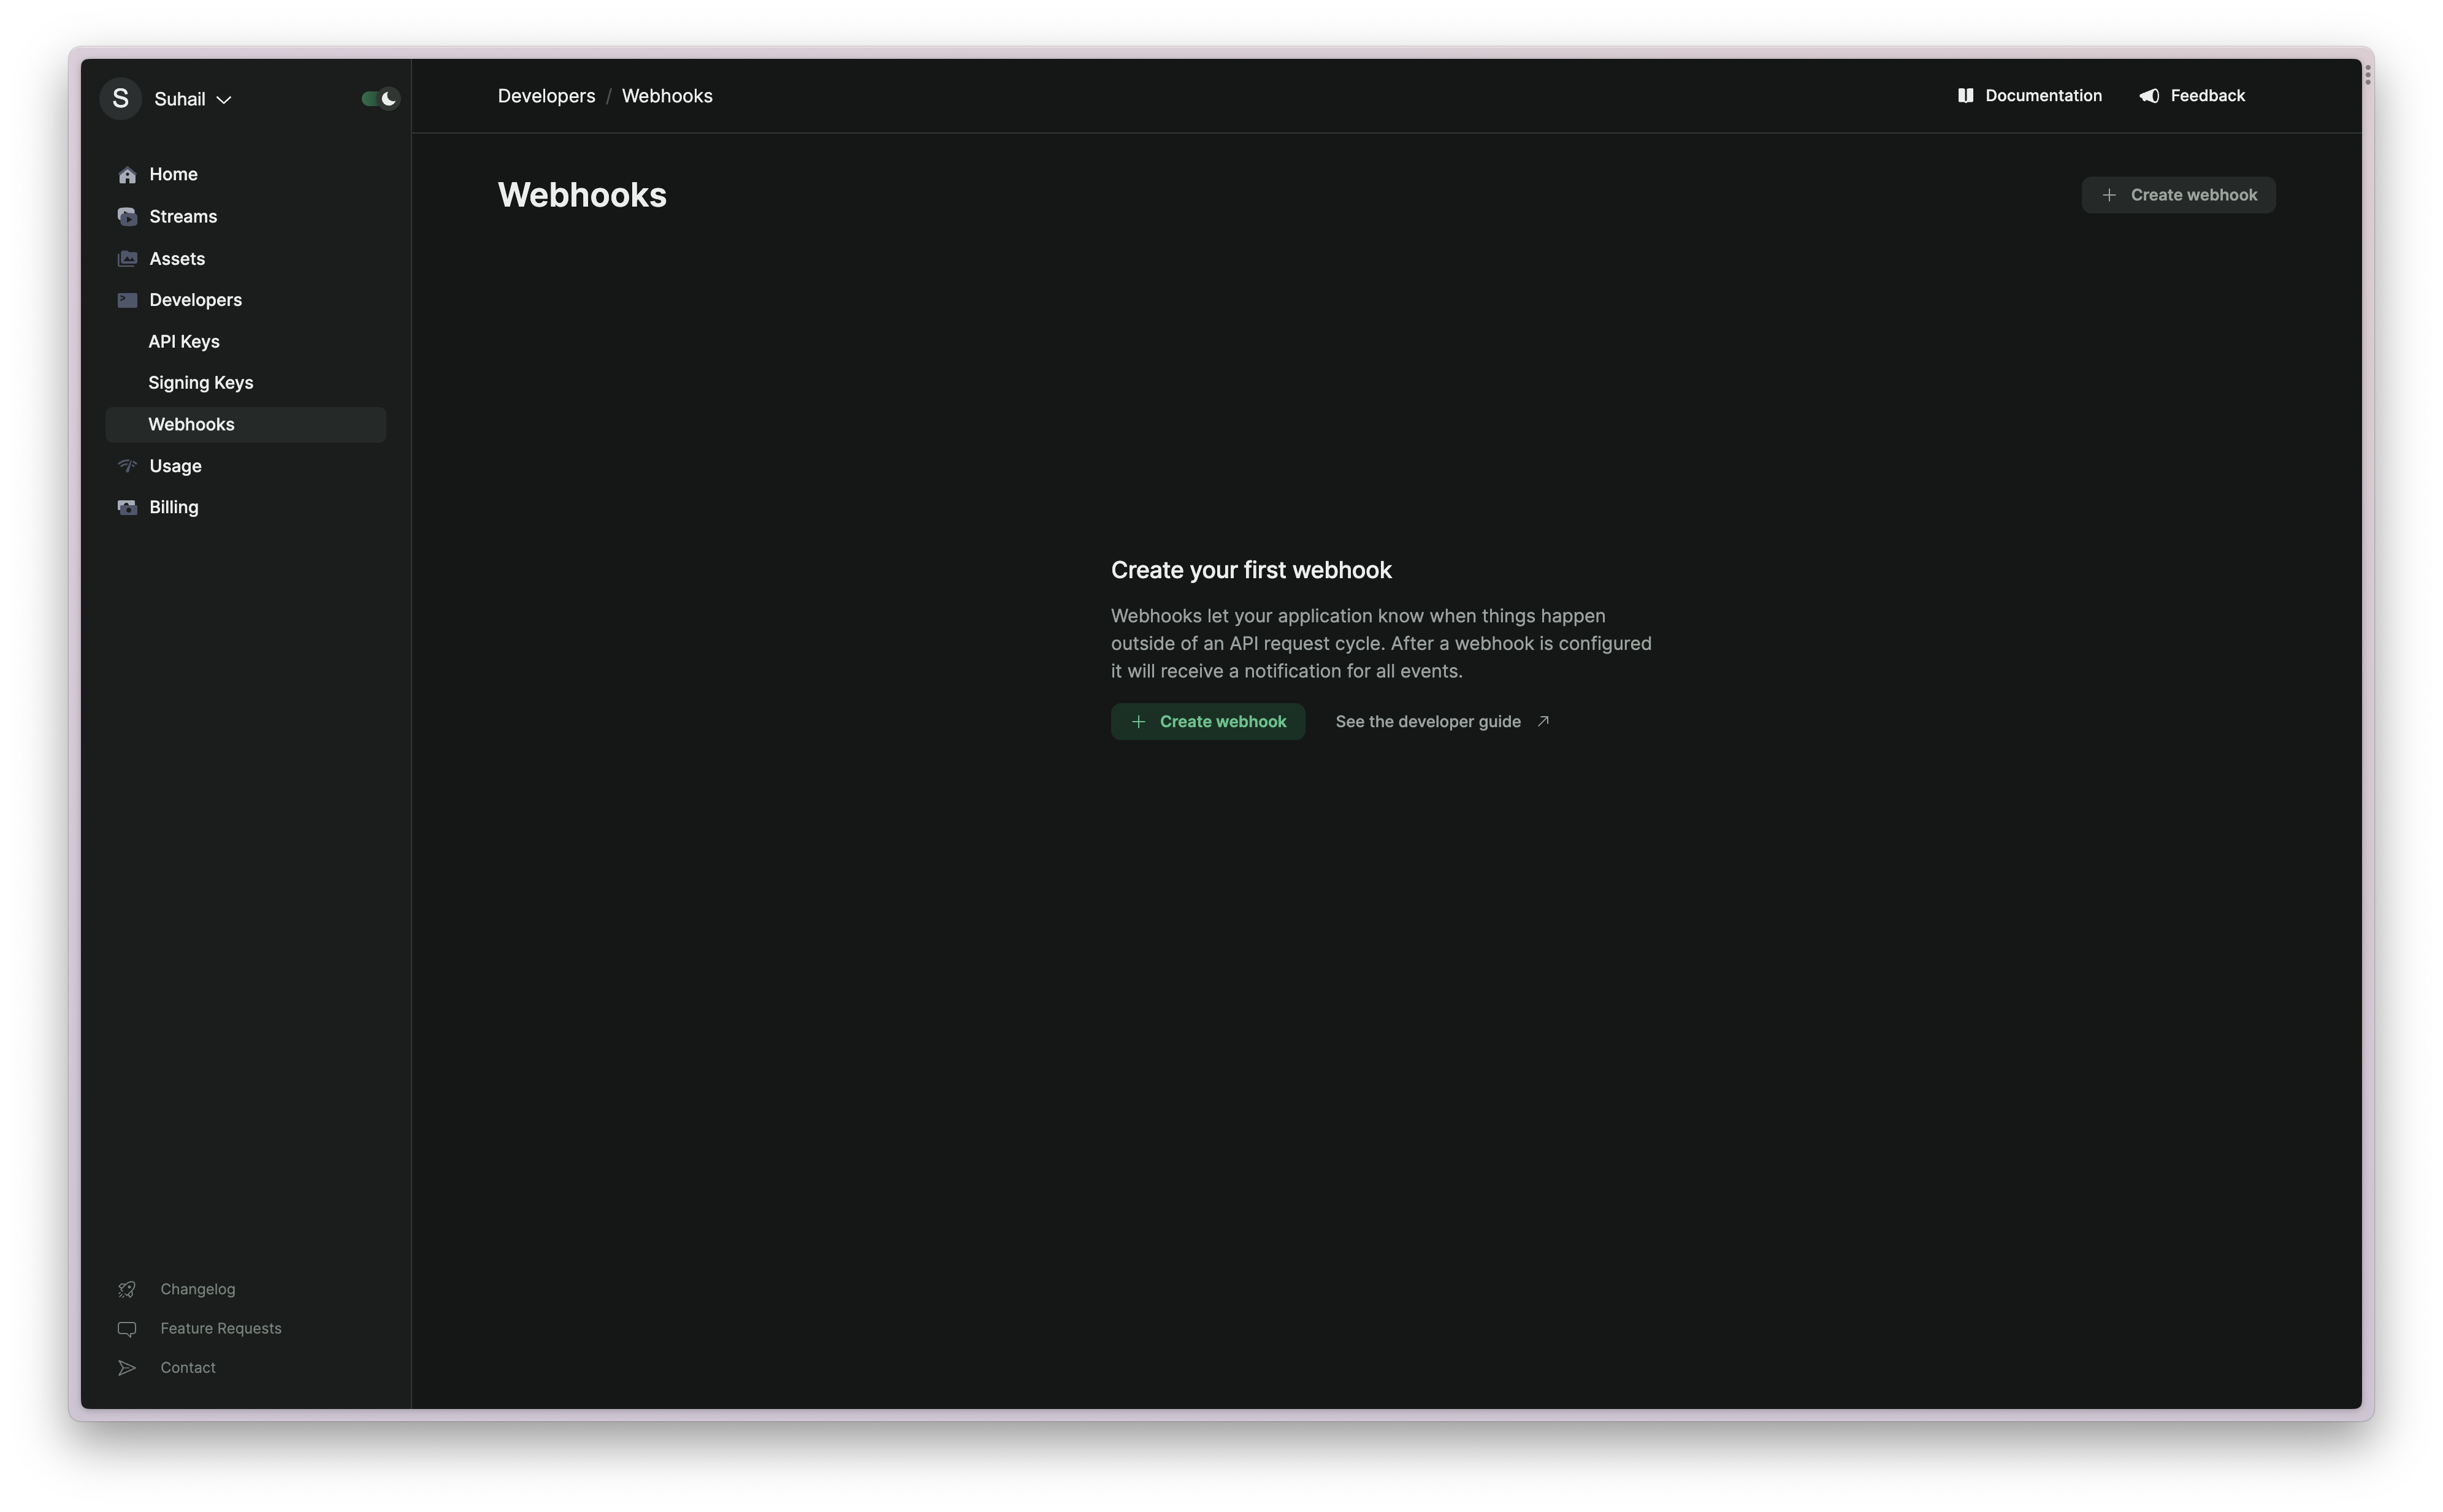 Click the Create Webhook button and enter your Ngrok URL as the webhook
endpoint. Select the an event to receive notifications for and click Create
Webhook.
You should now receive webhook requests for the event you selected.
## Webhook Payload
Webhook payloads contain information about the event that triggered the webhook.
The payload is a JSON object that contains different properties depending on the
event type.
The fields are defined as:
The id of webhook
The time when the webhook was created
The time when the webhook was triggered
The event type that triggered the webhook
The object payload. This will be a stream/asset/task. The definitions can be
found in the [API reference](/api-reference/overview/introduction) for the
specific object type.
## Webhook Signatures
It is highly recommended that you verify signatures of incoming webhooks. If
anyone has access to your webhook URL, they can fake events from Studio. See
[Webhooks.fyi](https://webhooks.fyi/) for examples on best practices for
webhooks.
You should verify the webhook requests that Livepeer Studio sends to your
endpoints, using the request header signature. This signature will help you
verify the incoming request.
* Livepeer Studio will include a signature in each event’s `Livepeer-Signature`
header.
* The timestamp is prefixed by `t=` and the signature is prefixed by a scheme.
* Schemes start with `v`, followed by an integer. Currently, the only valid
signature scheme is v1. Livepeer Studio generates signatures using HMAC with
SHA2-256.
```bash theme={"theme":{"light":"github-light","dark":"dark-plus"}}
Livepeer-Signature: t=36285904404,v1=88f3ff0fds9sf8a98vb0b096e81507cfd5c932fc17cf63a4a55566fd38da3a2d3d2
```
### Extract from the header
1. Split the header, using the `,` character as the separator, to get a list of
elements.
2. Split each element, using the `=` character as the separator, to get a prefix
and value pair.
The value for the prefix `t` corresponds to the timestamp, and `v1` corresponds
to the signature (or signatures). You can discard all other elements.
```bash theme={"theme":{"light":"github-light","dark":"dark-plus"}}
t=36285904404
v1=88f3ff0fds9sf8a98vb0b096e81507cfd5c932fc17cf63a4a55566fd38da3a2d3d2
```
### Prepare the signed payload
The `signed_payload` is the raw request payload.
It is important to note that the `JSON` in the request payload includes the same
`timestamp` from the signature header to protect against replay attacks.
Compare the signature (or signatures) in the header to the expected signature.
* **For an equality match** compute the difference between the current timestamp
and the received timestamp, then decide if the difference is within your
tolerance.
* **To protect against timing attacks:** use a constant-time string comparison
to compare the expected signature to each of the received signatures.
## Troubleshooting Common Issues
During the setup and operation of your webhook in conjunction with Livepeer
Studio, you may encounter issues that prevent your application from receiving or
processing webhook events as expected. Here, we'll outline some common issues,
their solutions, and how to debug them.
### Local Endpoint Configuration
1. **Not Receiving Webhook Calls:**
* Make sure that your local server is running and accessible. If using Ngrok,
ensure it's properly forwarding requests to your local server.
* Check the Ngrok's web interface (usually accessible at
[http://localhost:4040](http://localhost:4040)) to see the list of HTTP requests being forwarded to
your local server.
* Ensure that the URL you set in Livepeer Studio for your webhook endpoint is
correct and is the public URL provided by Ngrok.
2. **Error Messages in Your Server Logs:**
* Look at the console logs in your terminal where your Node.js server is
running to see if there are any error messages.
* Common errors might include problems parsing the request body, or errors in
your route handling logic.
3. **Verifying Webhook Signatures:**
* If you are having trouble verifying the webhook signatures, double-check
the logic in your verification code against the steps outlined in the guide
above.
* Ensure you are correctly extracting the timestamp and signatures from the
header and preparing the `signed_payload` string as described.
### Debugging Tips
1. **Logging:**
* Add `console.log` statements in your Express.js route handler to output the
request headers, body, and any other relevant information to the console.
* This can help you understand the data you're receiving and identify any
discrepancies between what you expect and what you're actually getting.
2. **Error Handling:**
* Add error handling logic to your route handler to catch and log errors.
This can help you identify issues in your code or configuration.
* Return meaningful error responses from your server to assist in debugging.
For example, return a 400 Bad Request status code with a message indicating
what was wrong with the request.
3. **Tools:**
* Use tools like [Postman](https://www.postman.com/) to send test requests to
your server to ensure it's responding as expected.
* Utilize Ngrok's web interface to inspect the HTTP requests and responses
being sent between Livepeer Studio and your server.
4. **Livepeer Studio Dashboard:**
* Check the Livepeer Studio dashboard for any error messages or logs related
to your webhook configuration or the events you are subscribed to.
Click the Create Webhook button and enter your Ngrok URL as the webhook
endpoint. Select the an event to receive notifications for and click Create
Webhook.
You should now receive webhook requests for the event you selected.
## Webhook Payload
Webhook payloads contain information about the event that triggered the webhook.
The payload is a JSON object that contains different properties depending on the
event type.
The fields are defined as:
The id of webhook
The time when the webhook was created
The time when the webhook was triggered
The event type that triggered the webhook
The object payload. This will be a stream/asset/task. The definitions can be
found in the [API reference](/api-reference/overview/introduction) for the
specific object type.
## Webhook Signatures
It is highly recommended that you verify signatures of incoming webhooks. If
anyone has access to your webhook URL, they can fake events from Studio. See
[Webhooks.fyi](https://webhooks.fyi/) for examples on best practices for
webhooks.
You should verify the webhook requests that Livepeer Studio sends to your
endpoints, using the request header signature. This signature will help you
verify the incoming request.
* Livepeer Studio will include a signature in each event’s `Livepeer-Signature`
header.
* The timestamp is prefixed by `t=` and the signature is prefixed by a scheme.
* Schemes start with `v`, followed by an integer. Currently, the only valid
signature scheme is v1. Livepeer Studio generates signatures using HMAC with
SHA2-256.
```bash theme={"theme":{"light":"github-light","dark":"dark-plus"}}
Livepeer-Signature: t=36285904404,v1=88f3ff0fds9sf8a98vb0b096e81507cfd5c932fc17cf63a4a55566fd38da3a2d3d2
```
### Extract from the header
1. Split the header, using the `,` character as the separator, to get a list of
elements.
2. Split each element, using the `=` character as the separator, to get a prefix
and value pair.
The value for the prefix `t` corresponds to the timestamp, and `v1` corresponds
to the signature (or signatures). You can discard all other elements.
```bash theme={"theme":{"light":"github-light","dark":"dark-plus"}}
t=36285904404
v1=88f3ff0fds9sf8a98vb0b096e81507cfd5c932fc17cf63a4a55566fd38da3a2d3d2
```
### Prepare the signed payload
The `signed_payload` is the raw request payload.
It is important to note that the `JSON` in the request payload includes the same
`timestamp` from the signature header to protect against replay attacks.
Compare the signature (or signatures) in the header to the expected signature.
* **For an equality match** compute the difference between the current timestamp
and the received timestamp, then decide if the difference is within your
tolerance.
* **To protect against timing attacks:** use a constant-time string comparison
to compare the expected signature to each of the received signatures.
## Troubleshooting Common Issues
During the setup and operation of your webhook in conjunction with Livepeer
Studio, you may encounter issues that prevent your application from receiving or
processing webhook events as expected. Here, we'll outline some common issues,
their solutions, and how to debug them.
### Local Endpoint Configuration
1. **Not Receiving Webhook Calls:**
* Make sure that your local server is running and accessible. If using Ngrok,
ensure it's properly forwarding requests to your local server.
* Check the Ngrok's web interface (usually accessible at
[http://localhost:4040](http://localhost:4040)) to see the list of HTTP requests being forwarded to
your local server.
* Ensure that the URL you set in Livepeer Studio for your webhook endpoint is
correct and is the public URL provided by Ngrok.
2. **Error Messages in Your Server Logs:**
* Look at the console logs in your terminal where your Node.js server is
running to see if there are any error messages.
* Common errors might include problems parsing the request body, or errors in
your route handling logic.
3. **Verifying Webhook Signatures:**
* If you are having trouble verifying the webhook signatures, double-check
the logic in your verification code against the steps outlined in the guide
above.
* Ensure you are correctly extracting the timestamp and signatures from the
header and preparing the `signed_payload` string as described.
### Debugging Tips
1. **Logging:**
* Add `console.log` statements in your Express.js route handler to output the
request headers, body, and any other relevant information to the console.
* This can help you understand the data you're receiving and identify any
discrepancies between what you expect and what you're actually getting.
2. **Error Handling:**
* Add error handling logic to your route handler to catch and log errors.
This can help you identify issues in your code or configuration.
* Return meaningful error responses from your server to assist in debugging.
For example, return a 400 Bad Request status code with a message indicating
what was wrong with the request.
3. **Tools:**
* Use tools like [Postman](https://www.postman.com/) to send test requests to
your server to ensure it's responding as expected.
* Utilize Ngrok's web interface to inspect the HTTP requests and responses
being sent between Livepeer Studio and your server.
4. **Livepeer Studio Dashboard:**
* Check the Livepeer Studio dashboard for any error messages or logs related
to your webhook configuration or the events you are subscribed to.